Wednesday, April 8, 2015

My Zoids restoration project: Iron Kong!

I'm taking a quick break from working on my Gunpla for the moment and giving some quality time to my only surviving Zoids kit.  The Zoids Iron Kong

My grandma bought this for me back in the late 80's.  It's an original Japanese release (OJR is the acronym Zoids enthusiasts use I believe).  It's been through a lot to say the least.  I've always been a sci-fi, anime and mecha fan and anything that had to do with these things always peaked my interest.  Looking back, I kind of regret never truly appreciated the potential value of my toys back in the day.  But then again, I have so many fond memories of spending countless hours playing with all of my toys and letting my imagination run wild!  So the mere fact that my Zoids Iron Kong is still alive and (more or less) intact is great news for me.  :)

Seeing how I put it together when I was still a teenager makes me laugh at myself for being such a noob at kit building.  I didn't have any side cutters or sand paper back then to get the parts out of their runners cleanly.  I just twisted the parts round and round until it came off the runners!  I still can't believe I was able to put it together without doing any major damage!

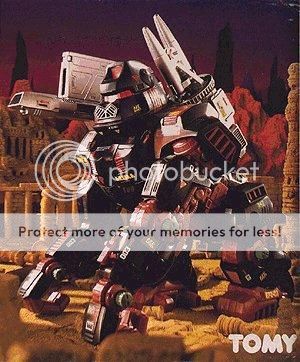
After doing a quick rebuild and inventory check, I found out to my dismay that I had a missing armor plate for the left arm, All the decals were missing, the pilot figures were missing as well.  And some small bits and pieces were broken off and I couldn't find them anymore.  The biggest loss I felt was for the box itself.  The box was nowhere to be found anymore and the kit was haphazardly placed in a plastic bag and put in storage.  The boxart was the first thing that drew me to this toy in the first place.  That picture of Iron Kong standing stoically, ready to do battle with any Zoid unit that was foolish enough to stand in its way.  That was really cool!  Too bad I couldn't find any image of the original box art except for the one below which seems to be incomplete...


 But for the most part, Iron Kong was still in pretty good shape considering all of the bad news I uncovered, and that was enough to keep me going forward on this restoration project.

First off, I had to get all the parts organized and set aside all the parts that I had to repair.  That was the easy part.  A bit of Tamiya plastic cement here and there, a bit of buffing out the rough edges,  sanding off the nubs and stress marks on the points that used to connect to the plastic runners, and TA-DA!  I was back in business :)


After cleaning all the parts and getting it ready for painting, I did a test with one of the arms first to see if I needed to do any priming.  Since I was using metallic black for the black parts and a metallic red for (you guessed it, the reddish parts!), I thought that applying a primer was unnecessary.  Fortunately, I was right and got the results I wanted.


As you can see, the unpainted arm is the one at the bottom and the painted one is at the top.  I was really happy with the results at this point.  This gave me the idea of not just doing a restoration job, but also doing some detail work afterwards to give old Iron Kong more life when I finally get my display case built and put him in a place of honor.  I'll make sure to post updates when I finish the detailing work.

It took me quite a while to paint all the parts since I was just squeezing this project in my spare time.  But after all that work, I'm happy to present to you my (partially) restored Zoids Iron Kong!


I took these shots at different times during the day so you'll notice that the lighting somehow differs at 2nd to the last photo (it was getting dark so I had to use the flash instead of relying on natural light).  I already started doing a paint test on the cable on the shoulder mounted missile launcher.  Bright yellow seems a bit too loud so I'll try another paint test using gold next time.  Once I get all the detailing done I do another photo shoot and show you guys the results.  Until then, I'm keeping my fingers crossed!

Here's some bonus shots of Iron Kong I took early in the morning when he was under direct sunlight.  I think it makes the metallic red too loud somehow.  I think I need to do some MAJOR brushing up on my photography skills...


Tuesday, March 31, 2015

Going Back to GUNPLA: What's up with GRIEPE?

Hey there!  Hope you're all having a great time wherever you are.  Me, I'm just dealing with a water shortage (yeah, we take water for granted until we don't have anything to drink or flush the toilet with *gross*).  But thank God this is just a scheduled water outage and things should be back to normal tomorrow.

So you're probably wondering what I'm currently working on?  I assuming that's why you're here in the first place right?  :P

Here's some photos of my work-in-progress.  G-Unit Griepe!


White base coat (primer) on the body and black metallic paint for the wing parts.  I want to do a custom paint job for this one that's different from the original color scheme (see photo below which I took a while back).


My handy-dandy parts organizers keeps my Gunpla parts in order.  I'm going to do some kit-bashing as well for this one just to make things more fun. :)  I got some parts from my old G-Unit Geminass (see image below).  Particularly the shield and wing / booster attachments.  I also took some bits and pieces off my broken down Nataku...


As for the color scheme, i'm thinking of using something on the dark green side with chrome parts and metallic black for the wings.  Maybe some yellow stripes and silver or gold for detailing.  Thinking of doing some weathering and battle damage while i'm at it so I  can get a feel for it.  Hopefully, it will turn out well...  Tune in for more news in the next few days!  Till then, keep on feeding your imagination!  :D

Monday, March 30, 2015

Going Back to GUNPLA: Gundam L.O. Booster ready for launch!

Finally!  I'm proud to show you my very first serious attempt at Gunpla model kit building!  After much research (basically watching numerous YouTube how-to videos by other Gunpla enthusiasts) and building up my tools and paint arsenal, I was able to apply what I learned, which consisted of:

1)  How to properly cut the plastic pieces from the runners they're attached to
2)  Sanding  / buffing to remove any rough spots and make some pieces fit better
3)  Using (Tamiya) putty to seal any gaps and even out any imperfections in the plastic pieces after assembly (followed by more sanding / buffing...)
4)  How to remove seam lines (I'm still working on this one though)
5)  Applying a primer before painting on the actual color(s)
6)  Masking to get that nice clean separation of colors when spray painting
7)  Scribing to add panel lines and make existing ones stand out more
8)  How to do proper panel lining and detailing using Gundam markers (I have Tamiya panel line accent colors but I plan to use that on my next kit)
9)  Choosing when to use matte or gloss clear coating
10)  Using alligator clips attached to sticks to hold your painted pieces during the paint curing / drying period
11)  How to be extremely patient especially when you mess things up!

Anyway, enough of that, here's the finished product!  I hope you like the photos, because they actually look so much better than the actual kit LOL! :D

Here's the BEFORE shot while it was still a work-in-progress:


And here is the AFTER shots showing the final result!  There's still a lot of imperfections to be seen in the pics since I had to do a lot of touch-ups to correct some painting / detailing errors (I don't have the steadiest hands anymore LOL!).  Also, I was a bit disappointed that the stickers and water-slide decals wouldn't stick anymore (I bought the kit back in the early 1990's after all!).  But at the end of the day, I was very pleased with the result.  I thoroughly enjoyed the entire build process and I want to share with you (at least visually) the fruits of my labor.  ENJOY!!!


(Ok, I'll buy a display stand for better action poses next time).  I'll be posting photos of my other work-in-progress (or WIP if you prefer), of the Gundam G-Unit Griepe!  Till next time, happy kit building!

Thursday, March 19, 2015

Going back to GUNPLA: My Works in Progress

For the time being, I'm just sharing some stuff I have going on as far as building Gundam model kits go.  I'll be posting more as I make progress.  Stay tuned! :)

Here's my very first MG (Master Grade) build.  I've always had a preference for 1/144 scale Gundam kits, but I've finally decided to bite the bullet and try my hand at building an MG scale (1/100) kit.  This Gundam is called Shin Musha


I'm hoping I can get it to look close enough to this after I finish painting it.  So this is a real big challenge for me at this point since I'm practically still a newbie at painting.  But learning what to do and not to do is all part of the fun!  :)


This other Gunpla I'm working on is another old backlog (1990's would you believe?).  It's a Gundam G-Unit L.O. Booster  (kinda sounds like "lobster" right? LOL!).  But one of my favorite units simply because it looks real darn cool as far as the box art goes...


I'll post more photos as I go along with these kits.  Hopefully, I won't screw up too badly and I'll have something worthwhile to show everyone.  I'm aiming to do most of the painting this weekend.  So till then, happy kit building everyone!!! :D

Sunday, March 15, 2015

Going back to GUNPLA! Gundam G-Unit Aesculapius

Talk about a tongue twister for a name!  AESCULAPIUS!  Try saying that with a straight face HA!!!  :) 

In any case, I finally finished snap building this cool mobile suit.  Another mobile suit belonging to the G-Unit line.  It's a cool dude because it has an alternate form which sports claws and a crab-like armor plating in the upper torso.  I was almost in despair because I thought I lost the upper torso  when we moved house.  Fortunately, another run through all my old Gunpla boxes turned up the missing part!  Hooray!  So here's another set of images I'd like to share.  I'm going to go back to this one of these days after I finish painting it and doing detail work.  So I hope you watch out for future posts on my adventures with my various hobbies!  As always, keep on FEEDING YOUR IMAGINATION!


Friday, March 13, 2015

Going back to GUNPLA! G-Unit Griepe Snap Build

This is one of my backlogs from way back in the 1990's...  The Gundam Griepe (G-Unit).  Just a snap build.  Still needs to be sanded, painted, panel lined, and decals applied.  I'll get back to this one of these days that's for sure!  (Note that I don't have a stand yet so I just made use of my wallet LOL!)


Wednesday, March 11, 2015

Going back to GUNPLA! Hello there Tallgeese!

This has probably got to be my LONGEST backlog ever as far as building Gundam Plastic model kits (GUNPLA) goes...  If memory serves me right, I bought a couple of Gundam model kits back when I was still in high school.  I always said I'd build them all before the end of that year.  We'll, that was back in the early 90's.  Guess what year it is now LOL!

Anyway, i've been able to take some pics of my feeble attempt at giving my old battle-worn 1/144 scale Gundam Tallgeese Mobile Suit an Iron-Man color scheme make over!

To be honest, I'm not too happy with the paint job since it's my first time to use acrylic spray paint.  I lost a lot of detail (panel lines, edges, small contours), so I'll need to do something about that in the future.  Too bad I lost the shoulder armor plates as some of you Gundam fans will likely notice.  It's been a really long time since I got this guy out of storage, and in between, we moved house (lots of stuff tend to get lost during such times right?).  Anyway, I'll probably get another 1/144 Tallgeese and hopefully do a better job this time.  I previously used Tamiya paint for brush painting.  But since it's been quite a while, and with the aid of the Internet, I have gathered various tips and techniques that I can now apply (insert maniacal laugh here)!  I need to control how much spray paint I apply (which is actually harder that it sounds).  So I'm seriously considering buying an airbrush just as soon as I have the extra cash.  I'm also contemplating going back to hand painting but this time, I'll experiment with thinning my paints first (such a newbie mistake!).

There's so much more I'm learning about building and painting model kits at the moment that my brain could burst hahaha!  It's a fun hobby, it's impractical, some say it's childish, and it'll bore a hole in your wallet for sure if you're a Bandai brand purist!  But GUNPLA is something I'll keep on doing simply because it makes me happy.  And shouldn't that be enough reason for doing anything? :D

   
In case some of you are still wondering what the original paint scheme looks like, here's the box art (still looks awesome btw), which I originally tried to follow to the best of my abilities back in the day (which wasn't really all that good).   :D